After the Mess
  • HOME
  • MY CRAFTS
  • MY RECIPES
  • MY BOOKSHELF
  • NEWS
  • GUESTBOOK

Mini Bath Bombs

8/13/2013

0 Comments

 
Picture
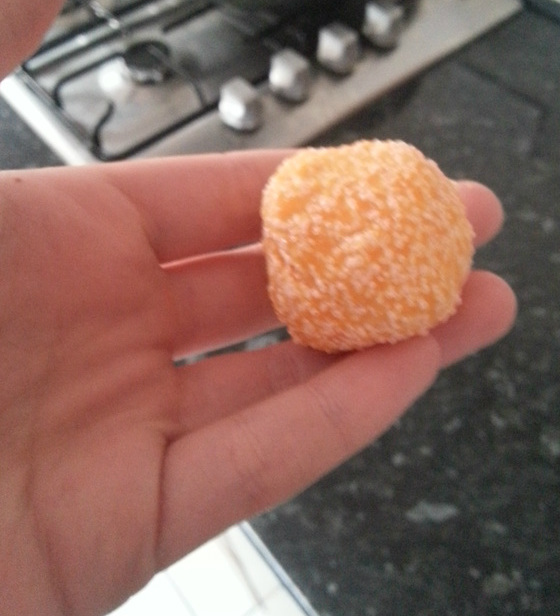
This are surprisingly easy to make.  It is one part powdered citric acid to two parts bicarbonate soda.  As mine are only mini bath bombs, I used 1 tablespoon to 1/2 a tablespoon, but it works just as well with 2 cups to 1 cup.
Mix the citric acid and the bicarbonate and add a few drops of food colouring if desired and a few drops of essential oil to make it smell nice.
Add, drop by drop, sunflower oil while mixing.  Keep mixing until the mixture starts to stick to the sides of the bowl.
Tip the mixture into cling film and using the cling film as a barrier, so not to touch the mixture, shape the mixture into a ball.  Leave to dry over night.  If you've added too much oil it may be a bit sticky in the morning, but it works just as good.  Store in a dry place.
Picture
0 Comments

Oil Jar Lamps

8/9/2013

0 Comments

 
Picture
So more crafts with jars it would seem - well I do have a large amount of jars to use, so why not?!

For this one I just bought some wicks and drilled a hole in the jar lid.  Added oil to the jar, any oil will do - I used regular cooking oil.  For a nice smell when the lamp was being burned I added some fruit (oranges and apples), but I've heard herbs work equally as well.  Make sure the lid is on tightly and wait until the oil soaks it way to the top of the wick and you are ready to go!
Picture
0 Comments

Vanilla Body Scrub

8/4/2013

0 Comments

 
Picture
This is probably one of the most easiest and cheapest things to make if you already have everything in your kitchen cupboard.

You need:
  • 2 cups of brown sugar
  • 2 teaspoons of vanilla essence
  • 2/3 of a cup of olive oil


All you do is mix them all together in a bowl and boom you're done.

If you are going to store this, I suggest stirring it before use as the oil does have a tendency to separate.  Also, if it doesn't smell enough of vanilla for you just ad a splash more vanilla essence.  I would also suggest to not use this around the face as the sugar can make it quite rough.

To use just rub into your skin and then wash off with warm water.  Please don't use it if you are allergic to any of the products.
0 Comments

Sorting Stationary

8/3/2013

0 Comments

 
Picture
As mentioned in the previous post, I have an unreal amount of jars and am trying to find things to do with them.
I also have an unreal amount of stationary, which was taking up two drawers in my desk.  I spot a solution.

I bought red and blue spray paint.  Washed the jars, sprayed them and organised my stationary in them.....problem solved!  And, of course, each jar has a particular item, one for pens, one for pencils, one for white board markers etc. 

Total number of jars used for stationary: 11
Picture
0 Comments

Solar Jars

8/2/2013

0 Comments

 
Picture
I found a dustbin full of empty clean jars in my garden.  We don't have a blue box that the council provide to take them away - must request one soon - and it's too much hassle to drag them over the recycling bank as we don't have a car.  So, I decided to see what we could do with some of the before we get our blue box.

On sorting out the jars I found a number of jars that were the same shape and size with the same lids.  There were very nice small jars with little gold lids and I thought "tea light holders".  But I'm a lazy person, and with 20 of these jars, I know what I wouldn't be willing to go around lighting 20 tea lights.  So the next best thing sprung to mind, "solar lamps".  I discovered mini solar panel or solar cells are quite hard to come by and quite expensive.  So I trotted off to Homebase and found these.  A small cost, but all the other materials were free or pre-existing so I was willing.

I took the light mechanism off, replace the jar lids with it and painted the jars and lids my colours.  Luckily the lids were of the same circumference, not something I checked before hand....phew, so just popped on top of the jars.

I really like the way you can see the paint strokes, and from a distance it looks like a wet surface.
Picture
0 Comments

Peg Gun

8/1/2013

0 Comments

 
Picture
I don't have children, as I myself am a massive child.  So how about a toy that will last all summer, is relatively painless - unless in the eye - and is cheap to make.

What you need is two pegs, two elastic bands and a piece of wood.
Use one elastic band to fasten the one peg onto the wooden post.  Take the spring off the other peg, place the elastic band in the spring and squeeze closed.  Using the fastened peg, hold the spring in lace on the twirled end.  Pull the elastic band onto the end of the wooden post - this is the most difficult part, you may need to move the fastened peg up or down the post.

To fire just press aim and press down the peg.  Find the ammo and relaunch.  You could even provide a few springs and coloured elastic bands so there can be war!!
Picture
0 Comments

Lost Socks

7/31/2013

0 Comments

 
Picture
I'm sure this is a common problem: You take all your newly clean and lovely smelling clothes out of the washing machine to find that the "washing machine has eaten some socks".  So your odd sock(s) go in the sock drawer.  More odd socks are found and they too go in the drawer.  So after a few months, there appears only to be a few pairs of socks and a dozen odd socks.

I am fed up with an odd sock drawer, rather than a sock drawer.  So I made a Lost Sock Post.  I cut a piece of wood to size and painted on my sign, if like me and at the age of 24 you can't stay in the lines you've drawn use a black marker to go around the edge of your letters to hide that fact that you've made the letters messy with paint...opps.  I then painted some pegs and nailed them on the wood.  To hang it on the wall I drilled in two holes, threaded some string through and tied to so branch that I found in the garden to secure it - easy as that.  Here lost socks can be pinned up by the washing machine, until their counter part turns up.  If the Lost Sock post becomes full and no counter parts can be found then it would have been confirmed.....the washing machine does eat all our socks!
Picture
0 Comments

Garden Table

7/18/2013

0 Comments

 
Picture
In our garden we have a corner plant space.  This built in plant box has convenient corners which are perfect for sitting on.....but alas there was nowhere to put your drink whilst sitting in the sun.  So off I trotted to B&Q, picked up some banister wood and some decking.  Cut the banister wood in half and took off the annoying sloped ends, sanded them down and nailed them onto my decking.....bazinga - table!
Picture
0 Comments

Chalkboard Dining

7/12/2013

0 Comments

 
Picture
After discovering how to make chalkboard paint, I couldn't help myself make more things with it!  I decided "personalisable dining set".
I got myself some thin-ish wood and traced some existing coasters and placemats.  After cutting out the shapes, I made my chalkboard paint (see here on how to make it) and painted and slated each board.  I made a set of six, with coaster and placemat matching.
You can write guests names on the coaster/placemat - no excuse for some one else drinking your drink....or you drinking someone else's drink.  You could also create different themes for dinner by adding a chalk design on each mat....although I can foresee insults being sent across the table via placemat.
Picture
0 Comments

Herb Garden

7/11/2013

0 Comments

 
Picture
Whilst clearing out my garden shed I found some hideous, yet in perfectly good condition, plant pots.  I recently saw a post here about making chalkboard paint, and thought "labelled pots".  Each pot is painted and the labels are just drawn on with chalk, so I can change the labels as I change the contents of the pot.

So how do you make chalkboard paint?
You need:
- acrylic paint
- grout
- something to paint (in this case plant pots)

How do you do it?
Mix half a cup of acrylic paint with one table spoon of grout.  


These measurements always confused me - there are too different sizes of cup to define a cup!  I think only in the USA do thy work frequently with the measurements.  I have spent hours trying to find conversions, but then I found scoops with the measurements on them in Pound Stretcher!  WIN!!


Once you've mixed enough to remove all lumps, paint your something.  You have to paint rather quickly as the grout causes the mix the dry quickly.


As you may see from the top photo that pint acrylic paint was measured out.  "But all your pots are blue!" The pink paint was thick and the lumps couldn't be removed, and the mixture wouldn't spread, but if you leave the paint in the sun for a while it thins out enough to work perfectly.
Picture
Picture
0 Comments

    Archives

    August 2013
    July 2013

    Categories

    All
    Beauty
    Dining
    Garden
    Other Home
    Toys

    RSS Feed


Powered by Create your own unique website with customizable templates.